Book a Tee Time
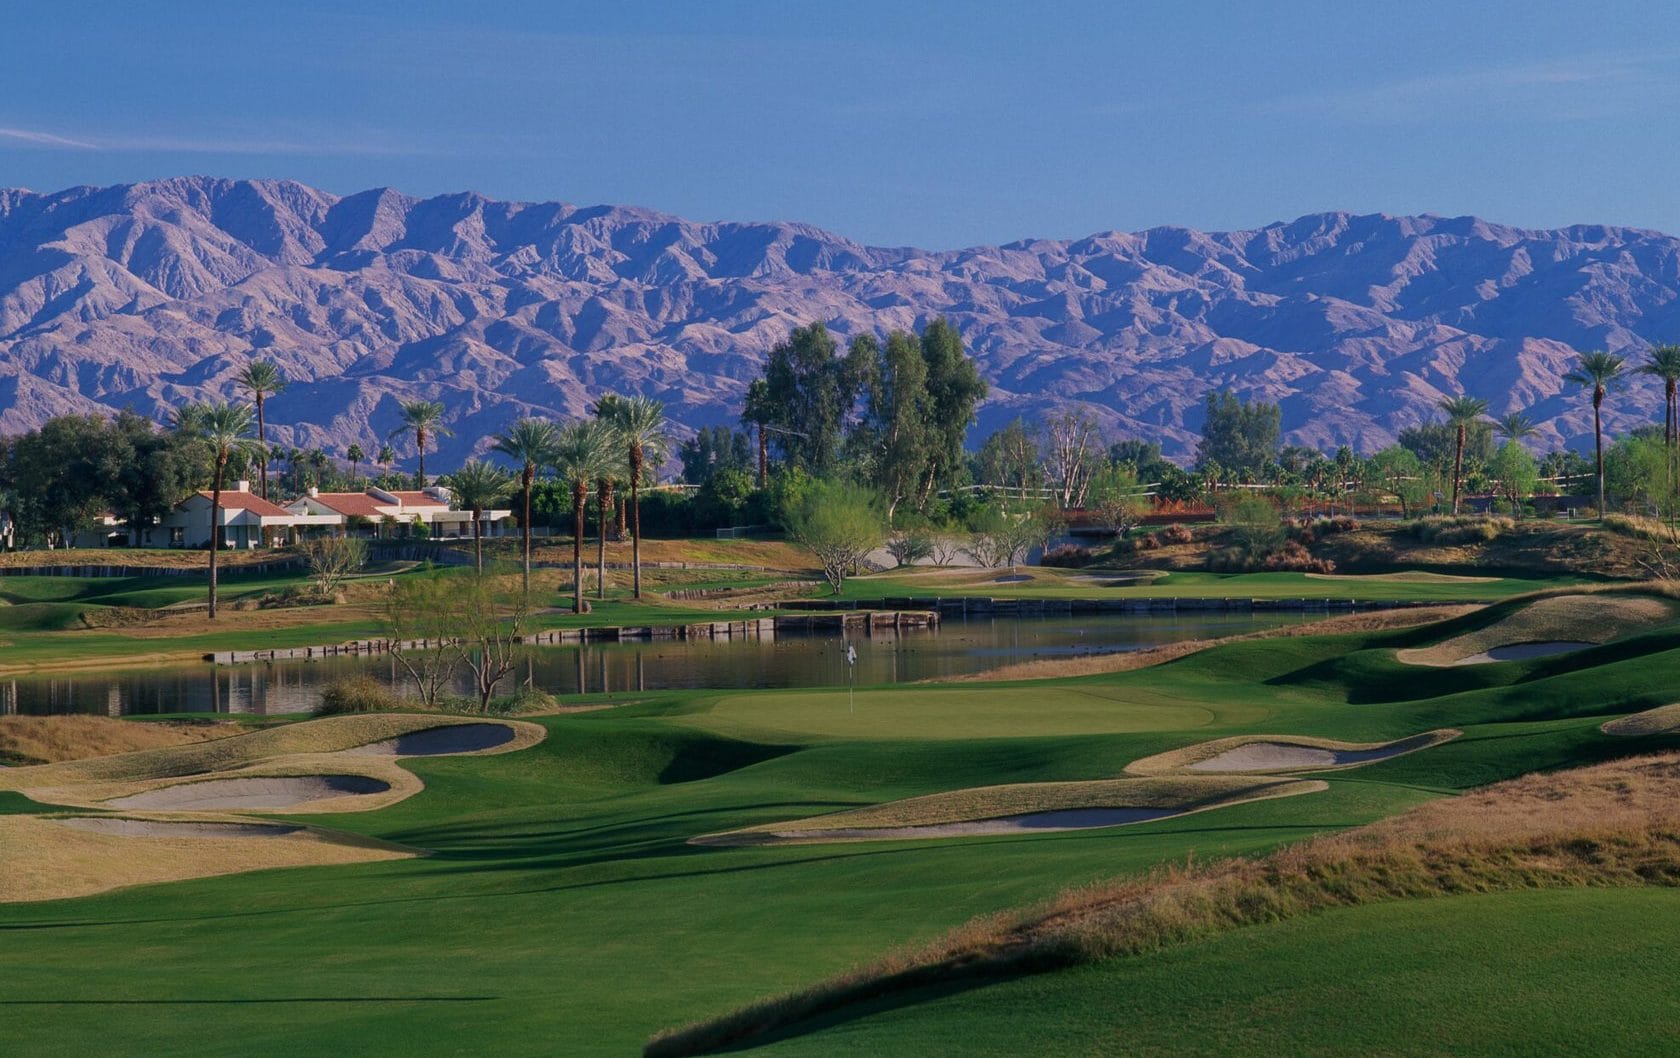
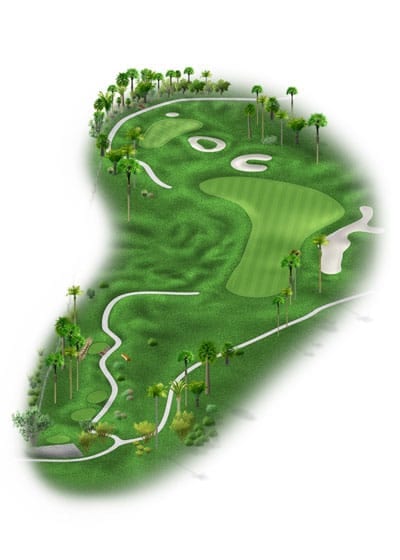
This 72-par course, designed by Pete Dye, offers traditional rolling-links style golf with Scottish and Irish flair, characterized by rolling mounds, manicured fairways and thick rough. Length, strength and finesse are key to scoring well on this course, which has hosted the PGA Club Professional Championship, and the Californian State Open.
Explore the Course
Hole-by-Hole
Hole
1
Par 4
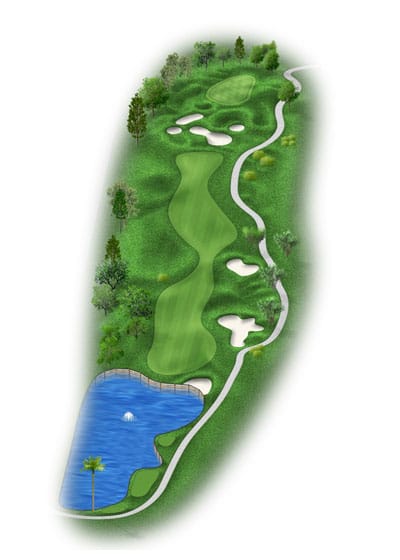
1st HOLE
par 4A great starting hole – place your tee shot down the left side of the fairway on a line toward the bunkers to avoid the water hazard to the right. Your second shot needs to be the correct yardage because of the small and undulated green. Long is no good on your approach.
Yardage
- Black
- 380
- White
- 364
- Silver
- 349
- Gold
- 324
- Red
- 294
- Orange
- 233
Hole
2
Par 5
2nd HOLE
par 5This is a fairly short par 5 where you should keep your drive down the left side of the fairway as most tee shots tend to roll to the right. Some players are able to reach this green in two. However, you must avoid the drop off on the left side to allow you to have a less difficult approach.
Yardage
- Black
- 510
- White
- 465
- Silver
- 454
- Gold
- 434
- Red
- 434
- Orange
- 330
Hole
3
Par 4
3rd HOLE
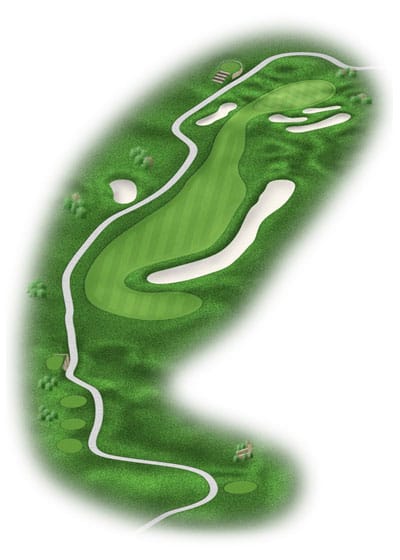
par 4This is a short par 4 and is very scoreable if your tee shot stays left of the large sand bunker on the right side of the fairway. Take advantage of this relatively flat green as there are many opportunities to make birdies.
Yardage
- Black
- 358
- White
- 312
- Silver
- 290
- Gold
- 270
- Red
- 236
- Orange
- 192
Hole
4
Par 4
4th HOLE
par 4Straightaway par 4 with plenty of room to let ‘er rip. The second shot plays slightly uphill and you must stay away from the grass bunkers to the right of the green. The green is relatively flat and slopes from back to front.
Yardage
- Black
- 318
- White
- 312
- Silver
- 294
- Gold
- 294
- Red
- 246
- Orange
- 235
Hole
5
Par 4
5th HOLE
par 4This is a dog-leg left par 4 and the ideal tee shot is down the right side of the fairway, leaving you a short iron to the green. The green is very undulated and tricky – a good test of your putting skills. Do not be long on your approach!
Yardage
- Black
- 353
- White
- 342
- Silver
- 330
- Gold
- 292
- Red
- 252
- Orange
- 215
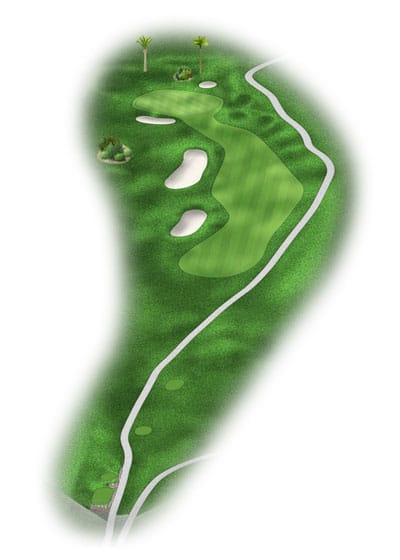
Hole
6
Par 3
6th HOLE
par 3The best shot on this hole is at the center of the green. The green is surrounded by bunkers and par is quite difficult if you miss the green. Club selection is imperative because a miss short and long makes for a challenging recovery.
Yardage
- Black
- 191
- White
- 173
- Silver
- 146
- Gold
- 106
- Red
- 92
- Orange
- 53
Hole
7
Par 5
7th HOLE
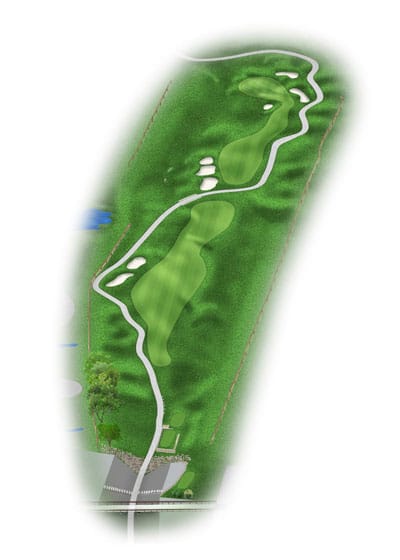
par 5A straightaway long par 5 – grip it and rip it! And, grip it and rip it again! Not many players can reach this green in two. Your approach should be from the left side of the fairway, which gives you the best angle to come in to the green. The green is fairly deep so make sure you take enough club on your approach.
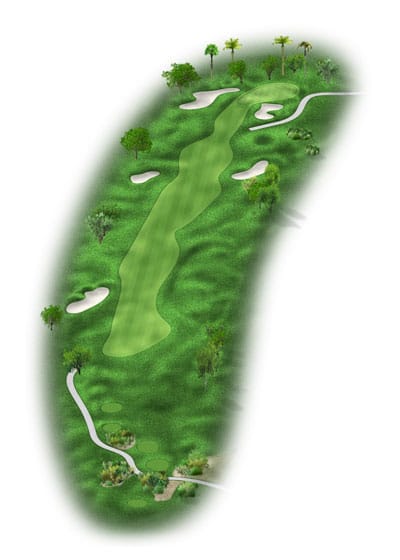
Yardage
- Black
- 591
- White
- 540
- Silver
- 513
- Gold
- 486
- Red
- 457
- Orange
- 355
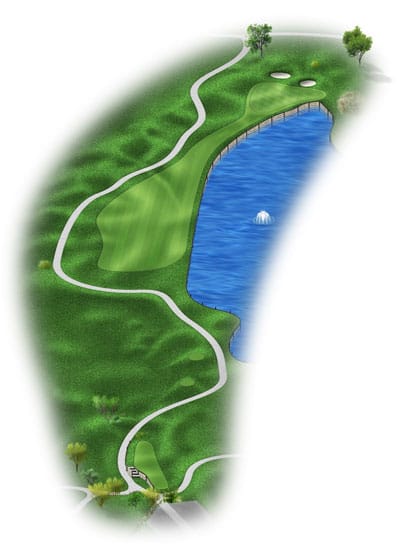
Hole
8
Par 3
8th HOLE
par 3A beautiful par 3 with water in front, to the right, and behind the green. If you miss the green, your only bail out is to the left and the up-and-down is extremely difficult. Club selection is very important. The green slopes away from the tee and to the right.
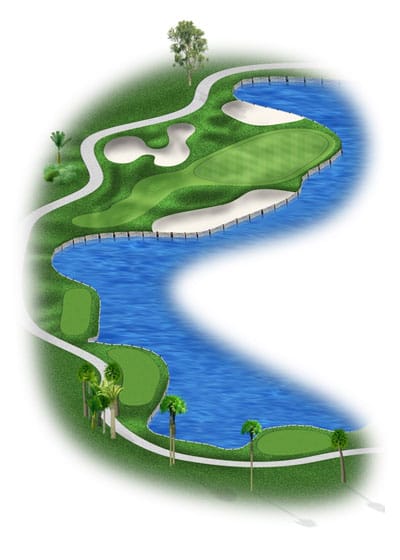
Yardage
- Black
- 184
- White
- 159
- Silver
- 138
- Gold
- 120
- Red
- 107
- Orange
- 80
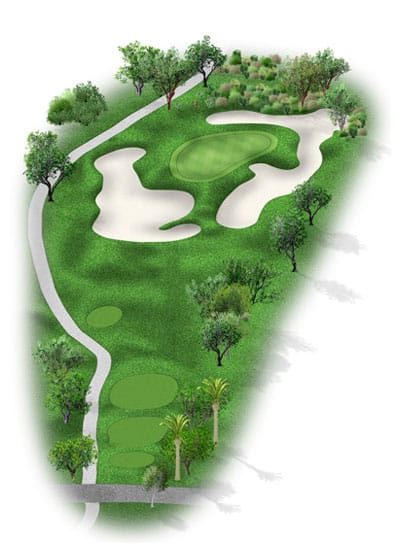
Hole
9
Par 5
9th HOLE
par 5A fairly short par 5. The best tee shot is straight down the middle of the fairway. Some players may be able to reach this green in two. If not, there are bunkers in the lay-up zone which you should avoid. This is a large green so pay attention to your yardage.
Yardage
- Black
- 491
- White
- 466
- Silver
- 453
- Gold
- 412
- Red
- 408
- Orange
- 330
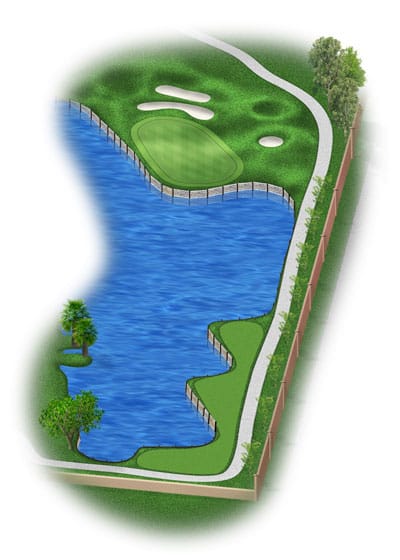
Hole
10
Par 4
10th HOLE
par 4A good par 4 with water all down the left side. The perfect tee shot will avoid the water on the left and the bunkers on the right. The second shot plays into an undulated green where putting can be difficult. The green slopes from the middle to the front.
Yardage
- Black
- 401
- White
- 388
- Silver
- 327
- Gold
- 314
- Red
- 271
- Orange
- 200
Hole
11
Par 4
11th HOLE
par 4A dog-leg left par 4 where your tee shot should be between the bunkers. Your second shot needs to carry the large greenside bunker in front to allow yourself the best chance for par or birdie. The green is relatively flat and there are not many difficult pin locations.
Yardage
- Black
- 417
- White
- 398
- Silver
- 363
- Gold
- 294
- Red
- 290
- Orange
- 236
Hole
12
Par 4
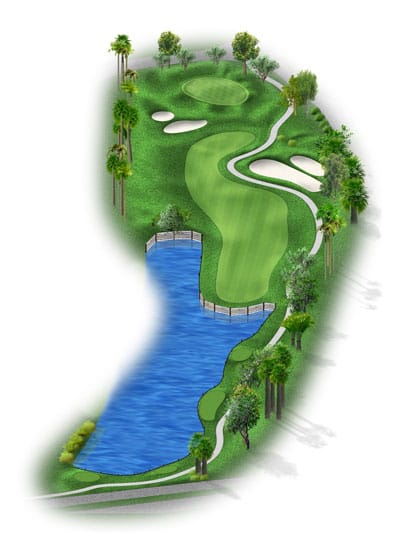
12th HOLE
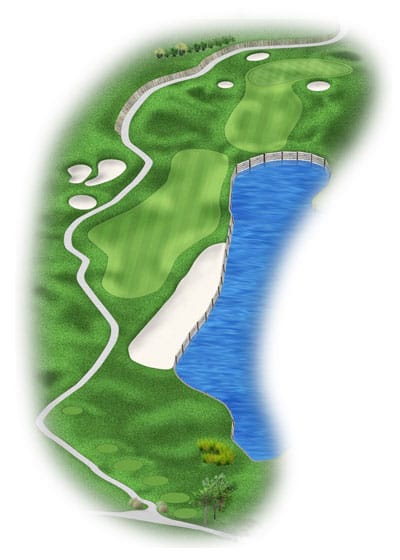
par 4A short par 4 with water to the left and out-of-bounds to the right. Most players tend to aim too far to the right to avoid the water on the left, which brings out-of-bounds into play. The greenside bunker to the right is a great target off the tee. On the approach shot, there’s a water hazard on the right which comes into play. Don’t be long on your approach.
Yardage
- Black
- 359
- White
- 335
- Silver
- 320
- Gold
- 311
- Red
- 305
- Orange
- 243
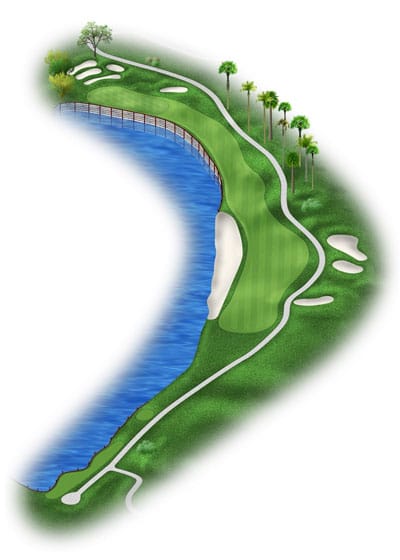
Hole
13
Par 3
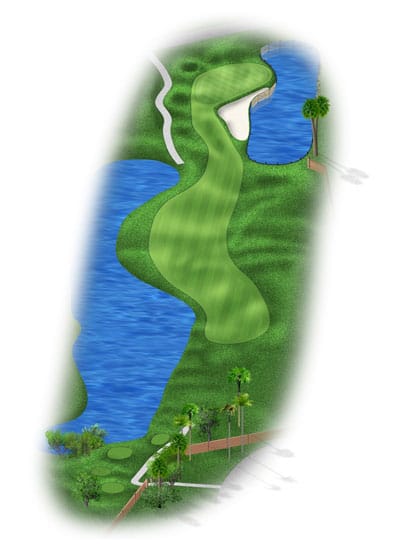
13th HOLE
par 3This is a short par 3 with water in front and to the left side of the green. The green is undulated and slopes from back to front. There’s no room for error off the tee. If your ball enters the water hazard, be sure to use the drop area at the red tees.
Yardage
- Black
- 145
- White
- 122
- Silver
- 114
- Gold
- 105
- Red
- 88
- Orange
- 88
Hole
14
Par 4
14th HOLE
par 4This is a fairly short, dog-leg left par 4. Your tee shot should be down the right side of the fairway, which will enable the best approach to the small, uphill putting surface. Avoid going over the green because it slopes severely from left to right.
Yardage
- Black
- 377
- White
- 354
- Silver
- 328
- Gold
- 278
- Red
- 271
- Orange
- 210
Hole
15
Par 5
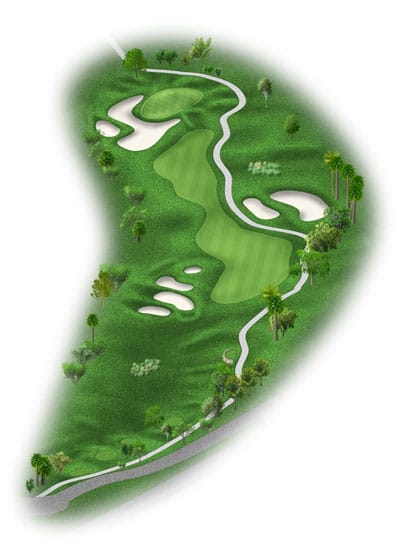
15th HOLE
par 5This is a long par 5 that slightly dog-legs to the left. Your tee shot should be down the right side of the fairway to have the best angle to the extremely deep green. It’s important to use the correct club as the approach plays uphill.

Yardage
- Black
- 505
- White
- 465
- Silver
- 460
- Gold
- 445
- Red
- 387
- Orange
- 340
Hole
16
Par 3
16th HOLE
par 3A long par 3 where par is a good score. The center of the green is a great play because of trouble on the left and right side of the hole. The green is fairly large – take enough clubs.

Yardage
- Black
- 198
- White
- 187
- Silver
- 169
- Gold
- 144
- Red
- 117
- Orange
- 105
Hole
17
Par 4
17th HOLE
par 4This is a long par 4 which bends around the water hazard to the left. This is the most difficult hole on the course. Your tee shot should be down the right center of the fairway to allow the best approach to the green. There is water from the fairway up to the green on the left side. The two-tiered green is undulated and it is difficult to make a two-putt.
Yardage
- Black
- 420
- White
- 414
- Silver
- 391
- Gold
- 369
- Red
- 334
- Orange
- 270
Hole
18
Par 4
18th HOLE
par 4Straightaway par 4; the best line on your tee shot is to aim at the clubhouse in the background to avoid the water on the right. Your approach shot should stay toward the left side of the green because of the water hazard to the right. A great finishing hole to make a birdie.
Yardage
- Black
- 380
- White
- 363
- Silver
- 346
- Gold
- 285
- Red
- 260
- Orange
- 185
Yardage & Scorecard
| hole |
|---|
| Par |
| Black |
| White |
| Silver |
| Gold |
| Red |
| Orange |